• Home
  • About
  • Register
  • 4x5 Requirements
  • Instructions
  • School Code
  • 4x5 Gallery
  • Partners
  • Portfolio Day
  • Home
  • About
  • Register
  • 4x5 Requirements
  • Instructions
  • School Code
  • 4x5 Gallery
  • Partners
  • Portfolio Day

Instructions for
Display, Labeling, and submission

Display Instructions

**Do Not Use for 2020**
See Virtual Display and Submission Instructions Coming Soon.

These instructions are in place to allow all work to uniformly fit and be displayed together cohesively during the show, to help with consistency in judging the work, and to help facilitate the safe return of all work to the proper school.
Picture

2D Instructions

The actual artwork itself must be 4 inches by 5 inches in size.  The 4-inch by 5-inch piece must then be matted with a single, 2-inch mat (black or white in color).  The outer dimension of the entire piece including the 2-inch mat should then be 8 inches by 9 inches. 

3D Instructions

Picture
Picture
Picture
The actual artwork itself must be 4”x5”x4”, 4”x5”x5”, or 4”x4”x5”.  No dimension shall be smaller than 4 inches or larger than 5 inches.  Sculpture in the round should be displayed on a wooden pedestal/base.  The pedestal/base must be 4 inches by 5 inches by 1 inch.  The pedestal/base must not exceed 1 inch in height (so a base constructed from a typical 1” x 4” board from a hardware store would be appropriate).  The base must be painted black (flat finish) and is not to be included in the final dimensions of the finished artwork.

***Please Note: In order to reinforce continuity with display for the show and better honor the original rules of the show, we are holding to a required 4x5x1 inching thick pedestal for all 3D pieces. This mirrors the need to mat all 2D work and adds visual continuity to the show itself. Please note above that the required 1 inch thick pedestal is separate from the sculpture measurements and should not be part of the 4x5 inch sculpture measurements just as with 2D works needing a mat but the mat is not a part of the 4x5 inch measurement.***

Relief Instructions

Picture
Relief work may include a hanging devise.  It would be greatly appreciated, especially for pieces that are heavier in weight (pieces are generally hung with steel thumbtacks, so please keep that in mind).  If a mat is appropriate or possible, the 4-inch by 5-inch piece should then be matted with a single, 2-inch mat (black or white in color).

Labeling Instructions
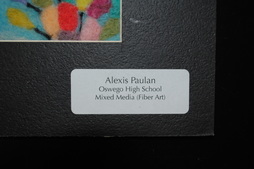
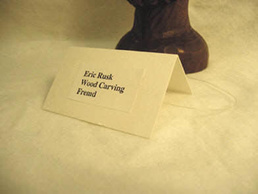
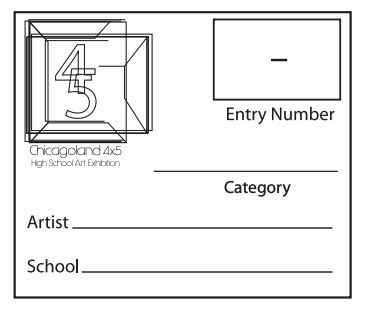
 The "identity" label is the visual tag which the public sees to identify the work. To help with formatting and unity of the show, we ask that these labeling instructions be followed in order to help your student artists work be displayed properly during the show. Please pay careful attention to the medium by first listing which of the 9 MEDIUM CATEGORIES you are entering the piece in followed by the specific media in parenthesis. *see examples below. FOR TEACHERS, you would label your piece with the medium category as TEACHER and then specify specific media in the same way as for students after. *see example below. Labels should be printed on a standard white 1 inch x 2 5/8 inch printable sticker label. We recommend:
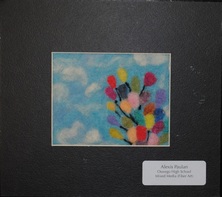
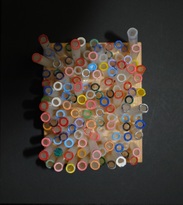
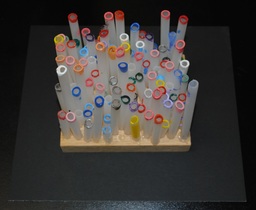
Avery Easy Peel Address Labels #5960

Artist Name
Medium Category (Specific Media)
School


*EXAMPLES*

Jane Smith
Drawing (Pen and Ink/Color Pencil)
Oswego High School


Jon Doe
Relief (Wood)
Oswego High School

**FOR TEACHER CATEGORY**

Ms. July Jones
Teacher (Acrylic)
Oswego High School


Please format your label text to be 12 pt. Times New Roman
Picture

2D Instructions

An “identity” label including the artist’s name, medium, and school name must be placed in the lower right hand corner of the 2-inch mat.
Picture

3D Instructions

"Identity" labels must be placed on a 
label tent
 (neutral in color) which is to be attached the artwork or pedestal/base with a piece of monofilament (fishing line).
Picture

Relief Instructions

“Identity” labels must be attached to the lower right corner of the relief piece or placed on a label tent (neutral in color) which is to be attached the artwork or pedestal/base with a piece of monofilament (fishing line) depending on the nature of the piece.

Submission Instructions

To ensure fair and proper judging as well as the safe organization, cataloging, and return of all works, it is imperative that the Submission Instructions be followed completely and the proper documentation accompany each piece and the entire collection from each school.
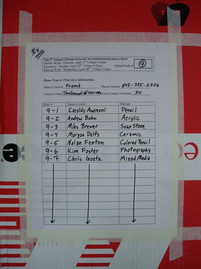
Two PDF documents are available to download. One is the "Information Label" and the other is the "Inventory Sheet". Please refer to the instructions below in order to download and learn  about their use.


Once registration is complete, each school will be assigned a "Registration Number". That number is designed to match the student work with the school it needs to go back to when the show comes down. This "Registration Number" will be posted on this site after the registration deadline. Please enter the "Registration Number" on all areas of the Inventory Sheet as well as the "Information Label" when prompted to do so.
Picture

Information Labels

We’ve included a page that has four artwork "Information Labels"  Please print out this page and make duplicates.  Each piece of artwork will need this “information” label.  This “information” label is separate from the “identity” label and is to be attached to the artwork as well (2-D work: taped to back, 3-D work: taped to underside of piece or base).  This “information” label is mandatory and will be imperative to the inventory process. The "Entry Number" is the SCHOOL CODE number followed by the number of the piece in the set of works submitted by the school 1 through 30. Any Faculty piece should be numbered starting with 31. Note that on the Information Label, it asks for "Category" which is the category that you wish the piece to be judged in. On the display label on the front, you describe the medium used.
4x5_informationlabels_2018.pdf
File Size: 536 kb
File Type: pdf
Download File

Picture
Picture

Inventory Sheet and Entry Box

Since we have limited space for storing the works prior to hanging, we ask that all work be packed in boxes to enable safe and stable stacking.  We suggest using the paper boxes commonly found in your school’s copy machine area measuring approx. 18”x11”x10”.  Please close all boxes, so they can be stacked.  Be sure to attach an "Inventory Sheet" to the entry box (taping the list to the lid of the box would work best as shown in these two images).

A second copy of the Inventory Sheet should be provided loosely placed inside with the work.
inventory_sheet_2.docx
File Size: 917 kb
File Type: docx
Download File

About

Register

Requirements

Instructions

Gallery

Copyright © 2015